Drawing a wolf can be a rewarding experience for artists of all levels. The majestic creature, known for its power and beauty, is a popular subject in art. Whether you’re a beginner or a seasoned artist, learning to capture the essence of a wolf on paper requires understanding its anatomy, practicing various techniques, and using the right tools. In this guide, we’ll explore everything you need to know about drawing:el5lvtvvu6c= wolf, with a focus on creating a detailed and lifelike representation.
Understanding the Anatomy of a Wolf
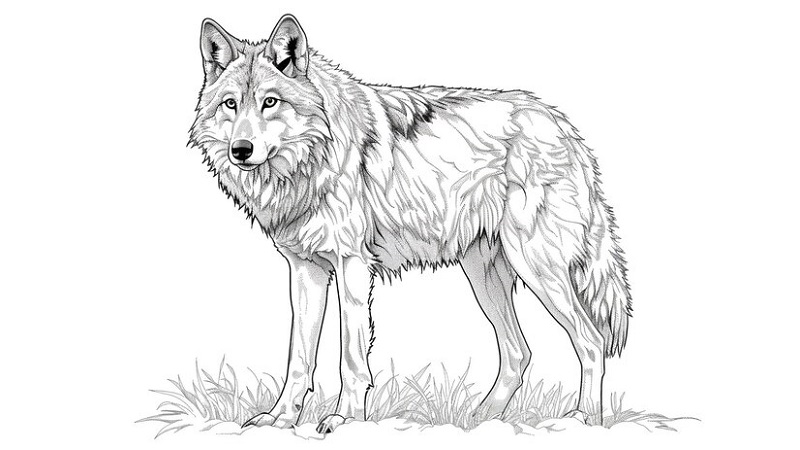
Before you begin drawing:el5lvtvvu6c= wolf, it’s crucial to understand the anatomy of a wolf. Wolves are powerful animals with a strong and agile build. Their bodies are designed for endurance, with long legs, a deep chest, and a muscular frame. The key to a successful drawing lies in capturing these characteristics accurately.
- The Basic Structure: Start by observing the overall shape of a wolf’s body. Notice how the head, neck, and body align in a sleek, streamlined form. The legs are long and sturdy, while the tail is bushy and often carried low.
- Key Features to Focus On: Pay attention to the wolf’s facial features, such as its sharp eyes, pointed ears, and elongated snout. The fur is thick and dense, adding to the wolf’s rugged appearance.
Tools and Materials for Drawing a Wolf
Choosing the right tools can make a significant difference in your drawing process. While some artists prefer simple graphite pencils, others may opt for a range of sketching tools to achieve various effects.
- Pencils and Sketching Tools: A set of graphite pencils ranging from 2H to 8B will give you a good range of light and dark tones. Mechanical pencils are also great for fine details.
- Paper Types and Other Materials: Smooth, high-quality drawing paper is ideal for detailed work. You might also want to use a blending stump or tortillon for shading, along with an eraser for highlights.
Starting with the Basic Shapes
Every complex drawing begins with simple shapes. When drawing a wolf, start by sketching basic circles and ovals to represent the head, torso, and limbs. This approach helps you establish the overall proportions and structure of the wolf before adding details.
- Sketching Circles and Ovals: Begin with a large circle for the head and an oval for the body. Add smaller circles where the joints (shoulders, hips) are located.
- Understanding Proportions: Ensure that the size of the head is proportionate to the body. Wolves have a broad head with a strong neck, so take care to represent these features accurately.
Drawing the Head of the Wolf
The head is often the focal point of any animal drawing:el5lvtvvu6c= wolf, and this is especially true for wolves. Their intense gaze and sharp features make their head a critical area to focus on.
- Outlining the Shape: Start by defining the shape of the wolf’s head, keeping it broad and slightly triangular. The snout should extend outwards, tapering to a point at the nose.
- Adding the Facial Features: Draw the eyes, nose, and mouth, paying close attention to their placement and size. Wolves have a keen, intelligent look, so try to capture this in your drawing.
Capturing the Eyes
The eyes are one of the most important elements in a drawing:el5lvtvvu6c= wolf. They convey the animal’s emotions and can bring your drawing to life.
- Importance of the Eyes in Wolf Drawings: Wolves have piercing, almost hypnotic eyes that can vary in color from yellow to brown. Their eyes are set deeply within the skull, giving them a sharp, intense gaze.
- Techniques for Realistic Eyes: To draw realistic eyes, focus on the shape and the reflection of light. Add a small highlight in the eye to give it a lifelike appearance.
Drawing the Ears and Nose
The ears and nose are distinctive features of a drawing:el5lvtvvu6c= wolf, and getting them right is essential for a realistic drawing.
- Shape and Placement: Wolves have large, pointed ears that are usually upright and forward-facing. The nose is broad and dark, with visible nostrils.
- Adding Details for Realism: Use fine lines to show the fur around the ears and the texture of the nose. The nose should be slightly shiny, so leave some areas lighter to represent this.
Sketching the Body
Once the head is complete, move on to the body. The body of a wolf is muscular but lean, built for running long distances.
- Proportions of the Torso: Start by sketching the ribcage, which should be deep and barrel-shaped. The stomach area should taper slightly towards the hindquarters.
- Positioning the Legs and Tail: The legs should be strong and straight, with visible muscle definition. The tail is bushy and should curve gently downward.
Fur Texture and Detailing
Fur can be challenging to draw, but with the right techniques, you can create a realistic texture that adds depth and dimension to your drawing.
- Techniques for Drawing Fur: Use short, overlapping strokes to mimic the appearance of fur. Vary the direction and length of the strokes to represent different areas of the body.
- Creating Depth and Dimension: Darken the fur in areas where shadows naturally fall, such as under the neck and along the sides of the body. This will make the wolf appear more three-dimensional.
Adding Shadows and Highlights
Shadows and highlights are crucial for giving your drawing a realistic look. They create contrast and make the wolf appear more lifelike.
- Importance of Light and Shadow: Determine the direction of the light source in your drawing. This will help you decide where to place shadows and highlights.
- Techniques to Enhance Realism: Use a blending tool to soften the edges of shadows. For highlights, use an eraser or a white pencil to add bright spots where the light hits the fur.
Finalizing the Drawing
After you’ve added all the details, it’s time to finalize your drawing. This step involves refining the lines, adding any last-minute details, and ensuring that everything is accurate.
- Refining Lines and Details: Go over your drawing with a sharp pencil, refining the edges and darkening the lines that define the wolf’s features.
- Checking for Accuracy: Step back and look at your drawing as a whole. Make any necessary adjustments to the proportions, details, or shading.
Common Mistakes to Avoid
Even experienced artists can make mistakes when drawing:el5lvtvvu6c= wolf wolves. Here are some common pitfalls and how to avoid them:
- Overcomplicating Details: While details are important, too many can overwhelm the drawing. Focus on the key features and avoid unnecessary complexity.
- Ignoring Proportions: Always check the proportions of your drawing, especially the size of the head in relation to the body. Incorrect proportions can make the drawing look unrealistic.
Tips for Beginners
If you’re new to drawing wolves, here are some tips to help you improve:
- Practice Techniques: The more you practice, the better you’ll get. Start with simple sketches and gradually work your way up to more detailed drawings.
- Importance of Observation: Study photographs and real-life wolves to understand their anatomy and behavior. Observation is key to drawing realistic animals.
Advanced Techniques for Drawing Wolves
For those who want to take their wolf drawings to the next level, try incorporating these advanced techniques:
- Dynamic Poses: Experiment with different poses, such as a wolf in mid-run or howling. This adds movement and drama to your drawing.
- Capturing Movement and Emotion: Use sweeping lines and dynamic shading to convey the energy and emotion of a wolf in action.
Conclusion
Drawing a wolf is a journey that requires patience, practice, and a keen eye for detail. By following the steps outlined in this guide, you’ll be well on your way to creating a stunning and lifelike representation of a wolf. Remember, the key to success is to keep practicing and refining your skills. The more you draw, the better you’ll become.
FAQs
1.How can I improve my wolf drawings?
Practice regularly and study the anatomy of wolves. Use reference photos to understand their structure and proportions.
2.What should I focus on when drawing a wolf’s face?
Pay attention to the eyes, nose, and ears. These features are crucial for capturing the wolf’s expression and character.
3.Which tools are best for drawing fur?
Graphite pencils are great for drawing fur. Use a combination of hard and soft pencils to create texture and depth.
4.How do I add shadows effectively?
Determine the light source in your drawing and apply shadows accordingly. Use blending tools to soften the edges and create a realistic look.
5.Where can I find more inspiration for wolf drawings?
Look at wildlife photography, visit zoos, or watch documentaries about wolves. Observing real wolves in different environments can provide valuable insights. Read More insiderdod.