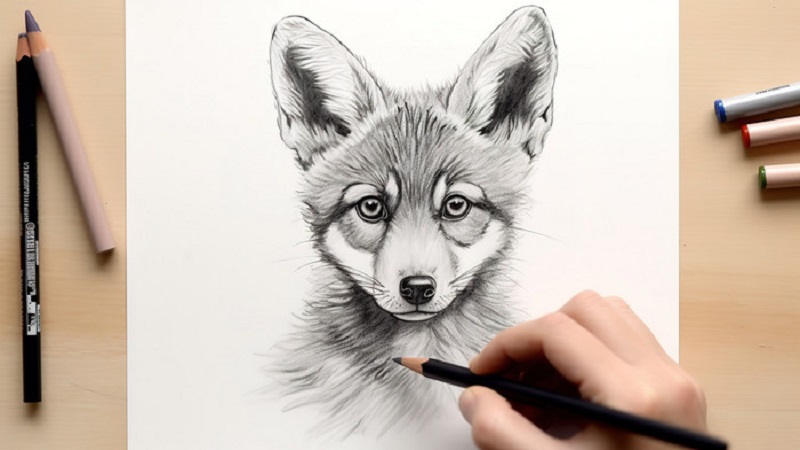
Drawing:1enzi6g2cvg= fox is a skill that allows us to express creativity and capture the beauty of the world around us. One subject that fascinates many artists, both beginners and professionals, is the fox. Known for its cunning nature and elegant appearance, the fox is a captivating creature to bring to life on paper. In this article, we will explore the intricacies of drawing:1enzi6g2cvg= fox, from understanding the basics of fox anatomy to mastering the techniques required to create a realistic and detailed drawing.
Understanding the Basics of Fox Anatomy
Before you start drawing a fox, it’s crucial to understand the basic anatomy of this animal. Studying the anatomy helps you capture the true essence of the fox, making your drawing more realistic. Foxes have a slender, agile build with distinct features such as a pointed snout, bushy tail, and alert ears. Focusing on these characteristics will guide your drawing and ensure that you accurately represent the fox’s form.
The Significance of Studying Fox Anatomy Before Drawing
Understanding the anatomy of a fox isn’t just about replicating its physical form; it’s about appreciating how each part of the fox contributes to its overall movement and behavior. This knowledge will allow you to draw a fox that looks natural and lifelike.
Key Anatomical Features to Focus On
When drawing a fox, pay close attention to its:
- Head and snout: Foxes have a sharp, triangular head with a long snout.
- Ears: Their ears are pointed and usually stand upright.
- Body: The body is slender but muscular, reflecting the fox’s agility.
- Tail: The bushy tail is one of the most distinctive features of a fox, often used for balance and communication.
Materials Needed for Drawing a Fox
The right materials can significantly impact the quality of your drawing. Here’s what you’ll need:
Essential Tools and Materials
- Pencils: Start with a range of pencils, from H (hard) to B (soft), to capture different levels of shading and detail.
- Erasers: A kneaded eraser is perfect for lifting graphite without smudging.
- Sharpener: Keep your pencils sharp for precise lines.
Recommended Paper and Pencils for Fox Drawing
For fox drawings, a medium-texture paper (such as sketch paper) works well because it holds the graphite while allowing for smooth shading. For finer details, consider using a smoother paper.
Choosing the Right Reference Image
A good reference image is essential for drawing a realistic fox. It provides you with the details you need to capture the fox’s unique features.
How to Select a High-Quality Fox Reference Image
Look for a reference image that clearly shows the fox’s body in good lighting. The image should be high-resolution so that you can see the fine details of the fur, eyes, and other features.
The Role of Reference Images in Enhancing Your Drawing
Using a reference image helps you stay accurate with proportions, shading, and textures. It acts as a guide, ensuring that your drawing of drawing:1enzi6g2cvg= fox is as realistic as possible.
Step-by-Step Guide to Drawing:1enzi6g2cvg= Fox
Now that you have a good understanding of fox anatomy and the materials you need, it’s time to start drawing. Follow these steps to create your fox drawing:
Step 1: Sketching the Basic Shapes
Start by sketching the basic shapes that make up the fox’s body. This will be the foundation of your drawing.
Drawing the Head and Body
Begin with an oval for the head and a larger oval for the body. Connect them with a curved line that represents the neck. Draw a smaller oval for the snout, and don’t forget to sketch the ears.
Adding the Legs and Tail
Next, sketch the legs using simple lines and circles to represent the joints. For the tail, draw a long, curved line that tapers at the end, keeping it bushy.
Step 2: Refining the Outline
With the basic shapes in place, start refining the outline of your fox.
Defining the Fox s Facial Features
Draw the eyes, nose, and mouth, paying close attention to their placement. The eyes should be almond-shaped, with a slightly mischievous expression.
Outlining the Fox s Fur and Tail
Add details to the fur by drawing short, curved lines along the body and tail. Make sure the tail appears bushy and thick, characteristic of a fox.
Step 3: Adding Details and Texture
Now, it’s time to add the finer details that will bring your fox to life.
Creating the Illusion of Fur
Use short, quick strokes to mimic the texture of fur. Vary the pressure on your pencil to create depth, with darker lines where the fur is denser.
Detailing the Eyes and Nose
The eyes are the windows to the soul, even in a drawing. Add highlights to the eyes to make them look shiny and alive. For the nose, use a darker shade to give it a moist, realistic appearance.
Step 4: Shading and Final Touches
Shading adds dimension to your drawing, making it look three-dimensional.
Techniques for Shading Fur
Use a soft pencil (like a 2B or 4B) to shade the areas where the fur is thicker or where shadows fall, such as under the body and around the eyes.
Enhancing the Depth and Realism of the Drawing
Finally, review your drawing and make any necessary adjustments. Add more details where needed, and ensure that the fox looks balanced and realistic.
Common Mistakes to Avoid When Drawing a Fox
Even experienced artists make mistakes. Here are some common pitfalls to watch out for when drawing a fox.
Overemphasizing Certain Features
It’s easy to overdo certain features, such as the eyes or fur. Remember that balance is key to a realistic drawing.
Neglecting the Proportions of the Fox’s Body
Maintaining accurate proportions is essential. An elongated body or oversized head can throw off the realism of your drawing.
Tips for Practicing and Improving Your Fox Drawing Skills
The more you practice, the better you’ll become at drawing foxes. Here are some tips to help you improve.
Regular Practice Techniques
Set aside time each day to practice drawing foxes. Experiment with different poses and angles to challenge yourself.
Studying Different Fox Species for Variety
Foxes come in different species, each with unique features. Studying these differences will enhance your versatility as an artist.
Conclusion
Drawing:1enzi6g2cvg= Fox is a rewarding experience that not only hones your artistic skills but also deepens your appreciation for this beautiful animal. By following the steps outlined in this guide, you can create a realistic and detailed fox drawing that you can be proud of. Remember, practice makes perfect, so keep drawing and exploring new techniques. The more you draw, the more you’ll see improvement in your work.
FAQs
1.How Long Does It Take to Master Fox Drawing?
Mastering fox drawing depends on your dedication and practice. With regular practice, you can see significant improvement in a few months.
2.What Are Some Beginner-Friendly Fox Drawing Tutorials?
There are many online tutorials available that cater to beginners. Look for step-by-step guides with clear instructions and visual aids.
3.Can I Use Digital Tools to Draw a Fox?
Yes, digital tools like tablets and drawing software can be used to create fox drawings. They offer advantages like easy corrections and a wide range of tools.
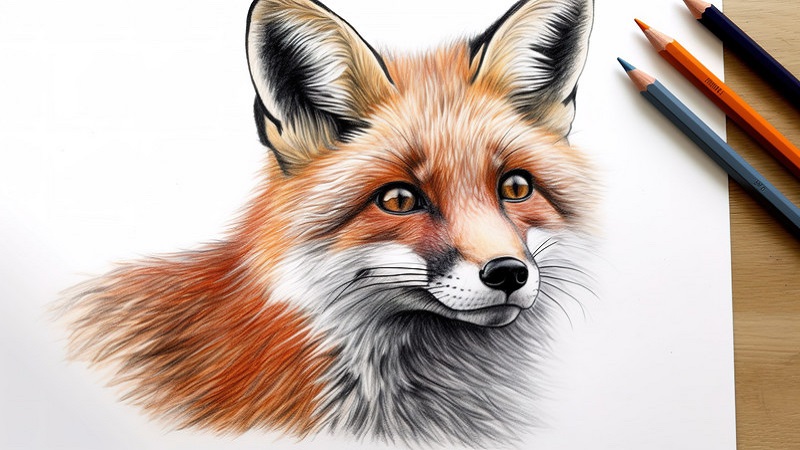
4.What Are the Best Colors to Use for Fox Drawings?
Foxes are typically reddish-brown with white underbellies and black-tipped tails. However, you can experiment with different color schemes to make your drawing unique.
5.How Can I Add a Background to My Fox Drawing?
Adding a background can enhance your drawing. Consider placing your fox in a forest setting, or keep it simple with a gradient background that highlights the fox. Read More insiderdod.