Drawing:lfgxzvm9-r8= owl is an expressive art form that allows people to channel their creativity. It transcends the boundaries of age and skill levels, offering endless possibilities for learning and self-expression. Owls, with their mysterious nocturnal nature, have fascinated humans for centuries. Their large eyes, sharp talons, and silent flight make them unique subjects for drawing. Whether you’re an aspiring artist or an experienced one, drawing an owl is an excellent exercise in both realism and stylization. This guide will walk you through every step needed to draw an owl, from the basic outline to advanced shading and texture techniques.
Understanding Owl Anatomy
Before starting any drawing, especially one that’s meant to be realistic, it’s important to understand the anatomy of your subject. Owls have some unique features that set them apart from other birds, and knowing these key traits will help you depict them accurately.
Key Features of an Owl
Owls are known for their broad heads, large round eyes, and strong, sharp talons. One of the most distinguishing features of an owl is its facial disk, which helps direct sound toward its ears, making it an excellent hunter. The beak of an owl is also a key feature—small yet powerful, it curves downward and is designed for tearing flesh.
Another important feature to consider is the owl’s feather structure. Unlike other birds, owls have very soft feathers that help them fly silently. This quiet flight is what makes them such effective hunters at night. When drawing owls, you’ll want to pay close attention to how the feathers are layered and how they help form the bird’s body.
Differences Between Owl Species
With over 200 species of owls, it’s essential to know that not all owls look the same. For example, the barn owl has a heart-shaped face, while the great horned owl has prominent feather tufts that resemble ears. Snowy owls are generally white with darker markings, while screech owls have a more camouflaged appearance.
Knowing these differences will help you decide what kind of owl you want to draw. Each species offers unique characteristics, allowing for diversity in your artwork. For instance, drawing a snowy owl would require a focus on smooth, white feathers, while a great horned owl will have a more rugged and textured look.
Materials Needed for Drawing:lfgxzvm9-r8= Owl
Basic Drawing Supplies
For beginners, all you need are a few basic drawing materials. Start with pencils ranging from HB (hard) to 2B (soft) to create different shades. A simple eraser will help you fix mistakes and clean up outlines. Paper choice matters too, with smooth paper ideal for precise lines, and textured paper better suited for more expressive, rough strokes.
Advanced Tools for Detailed Work
If you’re looking to add more depth and detail to your owl drawing, consider using other tools like blending stumps for shading or fine-tipped pens for detailed line work. Charcoal pencils are also great for adding rich, dark shadows, while colored pencils or watercolors can bring life to your drawing with a pop of color. Having a ruler or protractor can help with keeping proportions accurate, especially when sketching the initial layout.
Step-by-Step Guide to Drawing an Owl
Sketching the Basic Shapes
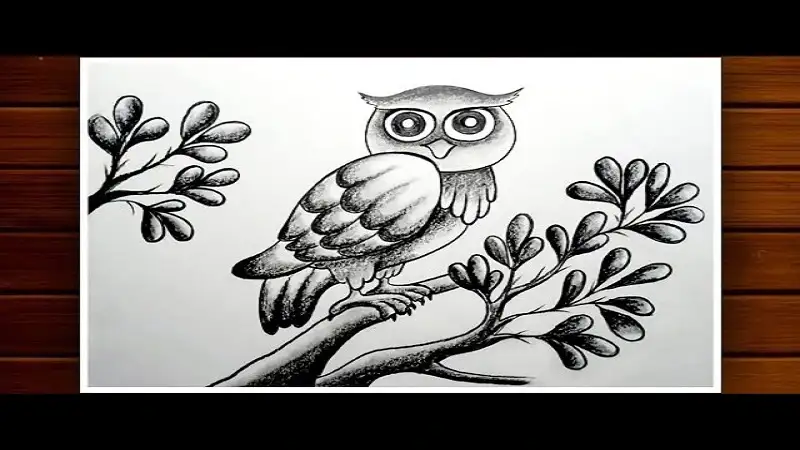
Every drawing:lfgxzvm9-r8= owl begins with simple shapes. For an owl, start by drawing an oval for the head and a larger oval or rounded rectangle for the body. These shapes don’t need to be perfect, but they will act as the foundation for your drawing. The eyes are usually placed near the upper part of the head and can be drawn as two large circles. The beak sits below the eyes, close to the center of the face, often resembling a downward-facing triangle.
Refining the Outline
Once you’re satisfied with the basic shapes, begin refining the outline by adding details like the wings, tail, and feet. You should also start to define the facial features, including the characteristic circular feather pattern around the eyes that most owls possess. Light, loose strokes will help guide you, and remember, it’s easier to correct mistakes in this stage than later on.
Adding the Feathers and Texture
Now that the general shape is in place, it’s time to add the feathers. Use small, deliberate strokes to mimic the texture of feathers. Remember, the owl’s feathers are not uniform in size; smaller, fluffier feathers surround the face and body, while the wings have longer, more structured feathers. Varying your line weight will also help make the feathers look more realistic, with thicker lines for larger feathers and thinner lines for the softer areas like the chest.
Drawing the Owls Face
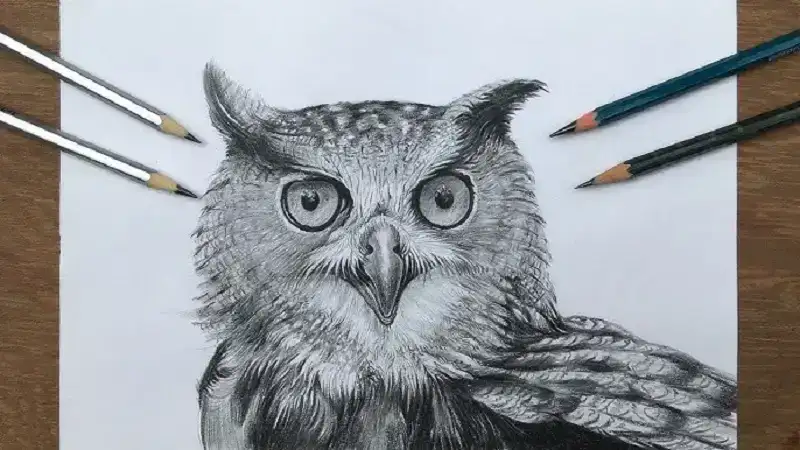
Capturing the Eyes
The eyes are often considered the focal point of any owl drawing. Owls have disproportionately large eyes in comparison to their head size, which gives them a distinctive look. To draw the eyes, start with two large circles, then add a smaller circle inside each for the pupils. A touch of white in the pupils can create the illusion of light reflecting off the eyes, giving your owl a more lifelike appearance.
Drawing the Beak
The beak is small and curved. Start by drawing a small triangle just beneath the center of the eyes, pointing downward. Make sure to curve the edges slightly to reflect the hooked nature of the beak. This feature is important for maintaining the owl’s predatory appearance, so don’t forget to give it sharp, clean edges.
Detailing the Facial Features
One of the most iconic parts of an owl’s face is the circular arrangement of feathers around the eyes, often referred to as the “facial disk.” These feathers help channel sound towards the owl’s ears. To capture this detail, use short, controlled strokes that radiate outward from the eyes, creating a soft texture that mimics feathers.
Focusing on the Owls Body
Proportion and Structure
When drawing the body of the owl, pay attention to its round, stocky shape. The owl’s body is more cylindrical than other birds, making it appear robust. The wings are generally folded at rest, and the legs are short but strong. Sketch the legs coming from the lower part of the body, slightly hidden by the soft, thick feathers.
Adding Depth to the Wings
For the wings, focus on layering the feathers. Start by sketching the outline of the wings, then add individual feather shapes that overlap one another. The wing feathers should be longer and more structured than the body feathers, which are usually smaller and fluffier. When drawing the wings in a folded position, they should appear compact, with the feathers slightly curving at the tips.
Shading Techniques for Realism
Shading is the key to making your owl drawing look three-dimensional. Use lighter shading on areas that would catch more light, like the top of the head and wings, and darker shading on areas in shadow, such as beneath the wings and around the talons. Gradual, smooth shading works best for the owl’s soft feathers, while sharper, more defined shading will help accentuate the harder edges of the beak and talons.
Drawing the Owl Talons and Feet
Importance of Detail in Feet
The owl’s talons are crucial for catching prey, and they are typically sharp and well-defined. Drawing these talons accurately will help add a level of realism to your piece. Use crisp, sharp lines to draw each talon, ensuring they look strong and ready to grasp.
Positioning the Talons
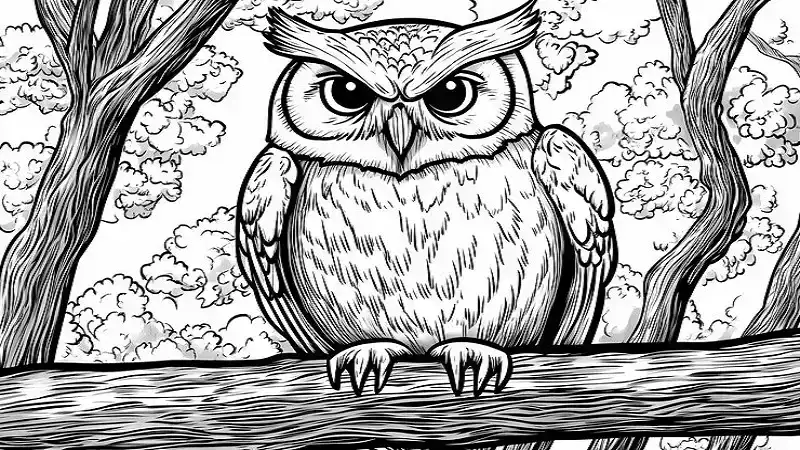
When drawing the feet and talons, consider how the owl is perched. If your owl is sitting on a branch, sketch the talons wrapping around the branch naturally. Pay attention to the way the claws curve and how they connect with the feet.
Background Elements for Owl Drawings
Forest and Tree Branches
Adding a background element, like a tree branch, can give your owl context and create a more complete scene. Start by drawing a rough sketch of the branch underneath the owl’s talons, and don’t be afraid to add leaves or other details. For a more natural look, keep the lines for the branches light and organic.
Nighttime Sky for Atmosphere
Because owls are primarily nocturnal, a nighttime background can really enhance the mood of your drawing. Consider adding a crescent moon or stars to the sky, using soft shading or blending techniques to keep the focus on the owl itself while still setting a moody, atmospheric scene.
Common Mistakes in Owl Drawing
Misjudging Proportions
One of the most common mistakes when drawing an owl is misjudging the proportions of the head to the body. The owl’s head is relatively large in comparison to its body, so make sure to exaggerate this in your drawing. Double-check your proportions by comparing your drawing to a reference image of an owl.
Overcomplicating the Feathers
It’s easy to get carried away with drawing every individual feather, but this can often make the drawing look too busy. Focus on the key areas where the feathers are most visible, like the wings and around the face, and keep the rest of the body softer with lighter, broader strokes.
Tips for Adding Realism to Your Owl Drawing
Using Light and Shadows
Realism in any drawing depends largely on how well you can use light and shadow. Make sure your owl has a clear light source, and use this to inform where your shadows will fall. The eyes, beak, and wings are all areas where dramatic shadows can add a lot of depth and realism.
Blending Techniques
Blending is an essential technique when drawing an owl, especially for the softer parts like feathers. Use a blending stump or your finger to gently smudge and blend your pencil strokes, creating smoother transitions between light and dark areas.
Choosing Color Palettes
For those who want to take their drawing further, consider using color. Owls generally come in earthy tones like browns, grays, and whites, but depending on the species, they might also have streaks of color. Layer colors to build depth, starting with light shades and gradually adding darker tones.
Final Touches and Polishing the Drawing:lfgxzvm9-r8= Owl
Reviewing the Entire Piece
Take a step back and assess your drawing as a whole. Look for any areas that need adjustments or improvements. Is the owl’s posture natural? Are the proportions and features accurate? Sometimes, putting your drawing aside for a few minutes and then returning to it with fresh eyes can help you spot areas for refinement.
Correcting Mistakes
If you notice any mistakes, don’t hesitate to fix them. You can erase small errors and redraw sections as needed. Artistic growth often comes from learning how to adapt and improve your work during the drawing process.
Displaying Your Drawing:lfgxzvm9-r8= Owl
Framing and Preservation
Once your owl drawing is finished, consider framing it. A simple black or wooden frame can give your piece a professional look and protect it from dust or damage. If you used colored pencils or watercolors, consider using a UV-protective glass to prevent the colors from fading over time.
Sharing Your Work Online
In today’s digital age, there are numerous platforms where artists can share their work, such as Instagram, Pinterest, or DeviantArt. Sharing your owl drawing not only allows you to showcase your talent but also lets you receive constructive feedback from a community of fellow artists.
Conclusion
Drawing an owl is a rewarding artistic challenge that allows you to experiment with different techniques, from basic shapes to detailed feathers and textures. With its intricate patterns and majestic posture, the owl is an ideal subject for both beginners and experienced artists alike. By following this step-by-step guide, you’ll be able to create a lifelike or stylized drawing:lfgxzvm9-r8= owl, honing your skills in anatomy, shading, and texture. So grab your pencils, find a reference image, and start your owl drawing journey today! Read More insiderdod.